Wednesday, October 25, 2017


                                      Donating to a Museum???


This way of passing on your collection item is not a bad plan.   BUT if you want your collection preserved and available to the public, there are a few areas that need to be considered, before making a donation of machines or literature.

1)   When you donate an item you lose all control over it.  Period.

2)   No reputable school or museum will guarantee much of anything about display or retention of a donation.   If they do make such a guarantee, don't believe them.   Over time, as the situation changes, the pledge will become undoable or forgotten.

3)   Your best indication of probable fate of your donation, is to check the fate of past such donations.  If they refuse to discuss that subject, then you have your answer and can walk away.   Your best chance for continued public access to your donation, is their past record of such access.

4)   You need to trust that if the item is eventually sold, it will go to someone who appreciates it.

We believe that DeBence Antique Music World is an example of a proper place to donate.   We hold in trust, what Jake DeBence collected, thus preventing it from being sold to and probably being hidden in many different private collections.   We keep all of it available for public view and performance.   We have received and added a number of major instruments over the last 20 years.

The Hammond/Aeolian Player Organ, the Nelson Wiggen Style 6, the Aeolian/Duo Art Grand, The Sohmer-Welte Upright and the Aeolian Duo-Art Grand Reproducing System all came to us needing repairs and have been restored and are exhibited and played for visitiors.

We have filled gaps in our phonograph and instrument collections with donated instruments which have been repaired and are now on display.   We have been given several non-working phonographs, duplicating items which we already have and have restored and sold them.   Proceeds from such sales are used for restoration and maintenance of the instruments in the collection and if the donors care, they are told where the money from the sale of their machine was used.

In summary, don't discount this way of passing on your collection items, as there are worthy places to donate an item where it will be restored, preserved, exhibited and played.   You just need to do your homework and research to find them.


Thursday, October 19, 2017


                                             Repairing a Reed Organ  -             Part 3

A Smith Reed Organ was brought to us for repair to playing condition.   This was not a restoration job, just a repair to good playing condition.

In the past, we had wire brushed all rusty screws before reassembly.  The advent of EVAPO-RUST has made this job a lot easier.  Just put the rusty screws in a bottle of it, wait 24 hours and you have nice clean parts.


As we proceeded in reassembly, we found the root of the stuck stops problem was a transfer of parts between stop hardware, which once identified, was easily corrected.


As with most older wood mechanisms, there were some split parts which we glued back together.


With reassembly completed, we checked to see if all the reeds sounded and had to free a few stuck ones.

The final job was recovering the front grille with the corrected cloth.


At this point, the job is essentially done and the organ is ready to return to the owner.


Wednesday, October 11, 2017


                                                   Repairing a Reed Organ - Part 2

A Smith Reed Organ was brought to us for repair to playing condition.   This was not a restoration job,  just a repair to good playing condition.

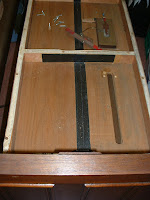
We got the problem of the big stack leak under control, but further investigation showed some cracks in the top half where the valves mount.    These were sealed with silicon sealer for the larger ones and shellac based sealer for the narrow ones.


Now we can start reassembly.   The bottom of the air chest was put in place and then the top installed.


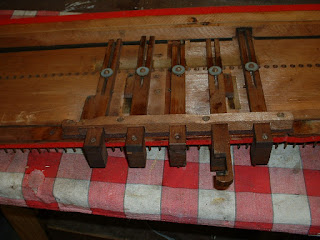
The valve push rods were carefully arranged when removed, so as to be able to install them in the same position they came from.   Before the next layer could go on, the stop slides which were hard to move, had to be freed up and readjusted.


Wednesday, October 4, 2017


                                                             Repairing a Reed Organ  - Part 1                                                       

A Smith Reed Organ was brought to us for repair to playing condition.   This was not a restoration job, just a repair to good playing condition.

A quick try at playing it, showed that the bass section would play with a lot of pumping, indicating a good size leak.   The stops were hard to move and did not seem to change the sound.   The tremble section would not play at all.   The treble swell shade seemed to be disconnected.

Smith organs were assembled in the case, so you can't just unscrew the action and slide it out.   You have to disassemble layer by layer.


Once we got inside the air chest, a major leak became apparent.   Making the base out of several pieces of wood is common and the joints are normally sealed by gluing a piece of motor cloth over them.   In this case, the cloth had failed, leaving a 1/8 inch open slot.


After taking the bottom half of the air chest out, it was possible to tape off the reservoir and check the pumps.   The pump and reservoir assembly had been rebuilt about 35 years ago.   They tested to still be in excellent condition.   We treated the cloth with preservative and it should be good for a long time.

We removed the remnants of the orginal air chest crack patch, cleaned off the old glue and glued on
a new patch.